Test internal DAST projects with Polaris Secure Tunnel
Use Polaris Secure Tunnel, a feature of the Black Duck Bridge, to securely access web applications and APIs in your private network. This allows you to run DAST tests on internal targets from the Polaris web UI, API, or Bridge CLI (where Secure Tunnel is started automatically in version 3.7.0 or later). If you plan to run DAST tests directly from Bridge (v3.7.0 or later), skip this task and see DAST configuration requirements in the Bridge CLI documentation.
About Secure Tunnel
With Secure Tunnel, you can establish a secure TLS connection directly to a target web application or API in your private network, without the need to open any ports or allowlist IP ranges for Polaris.
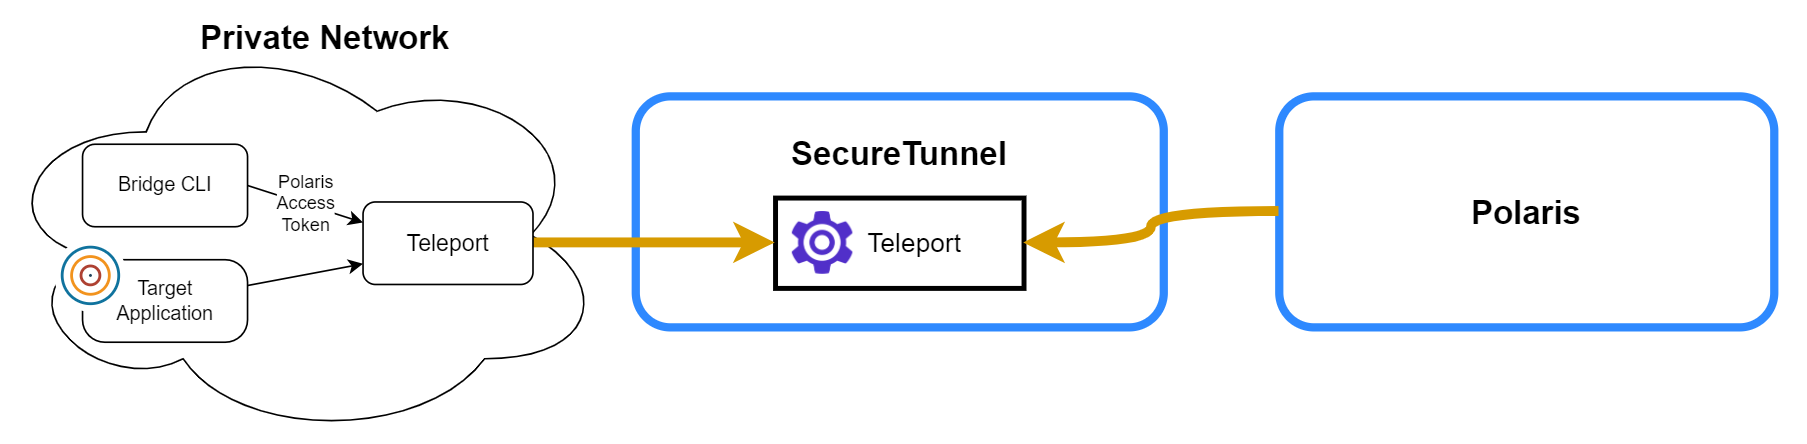
Secure Tunnel uses the Teleport Access Platform for secure and self-service connectivity to private applications. Teleport functionality is integrated with the Bridge CLI and requires no account setup or local installation.
Prerequisites
Before you begin, make sure that you have:
- Created an access token or service account token. See Make an access token and Service Accounts for Polaris for more information.
- Created a DAST project configured as internal (select the Entry Point URL is in a private network option). See Create and test DAST projects for web applications and APIs.
- Downloaded and installed the Bridge CLI. See Download the Bridge CLI.
- Reviewed the Secure Tunnel system requirements. See Connect to an internal DAST target from the Bridge CLI.
Connect to an internal DAST project with Secure Tunnel
Use the Bridge CLI to open a secure tunnel between Polaris and an internal target in your private network. You can skip this task if you plan to run DAST tests on the target directly from Bridge; see DAST configuration requirements for details. Note that Bridge does not create DAST projects in Polaris.
Test a DAST project
Follow these steps to run a DAST test from the Polaris user interface:
-
There's more than one way to start this procedure:
- Go to Portfolio, select an application, click the three-dot
 icon at the end of the project's row, and select New Test.
 - Go to Tests and select New Test.
- Go to Portfolio, select an application, click the three-dot
-
Select the DAST profile to scan with the Application and Project dropdown menus.
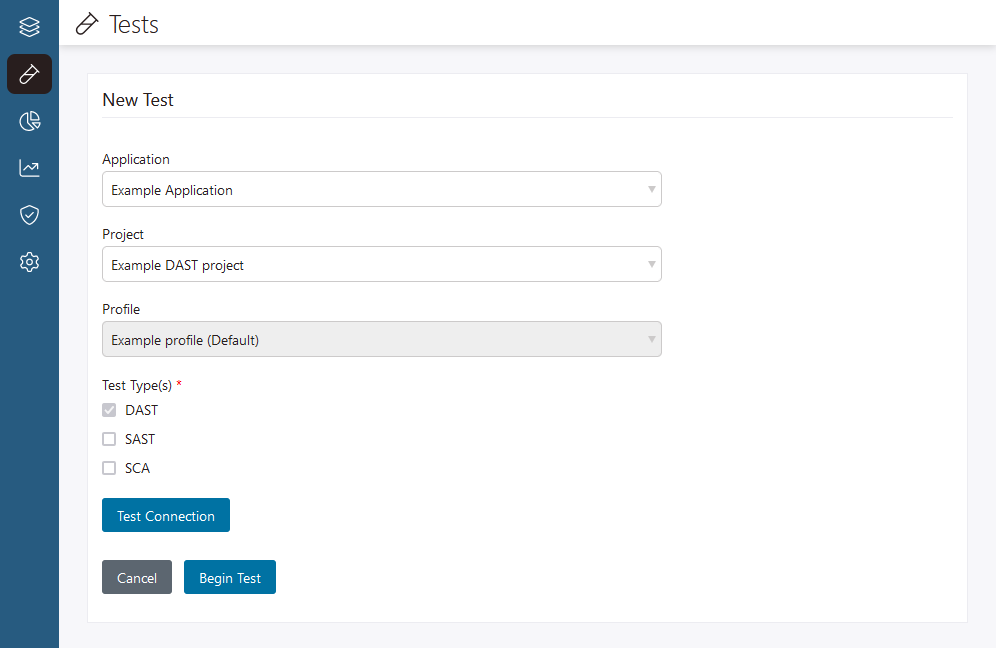
Note: Depending on how you start a test, the Application, Project, and Profile values may already be filled in.